Create a options page in WordPress with React – Part 1
Despite the advances in Gutenberg that we have seen in recent years, with the idea that the options of a post (or a page) should be managed within the WordPress editor (a.k.a Gutenberg). Many times we still find ourselves in the need to have a page where we can manage all our global options, outside of each post in particular. Next, I will show you how to create an options page in WordPress with React.
Table of Contents
- Introduction
- Step 1: Creating the local environment
- Step 2: Create an options page in WordPress
- Step 3: Register our scripts
- Conclusion
Decisions, decisions…
Like everything in WordPress (and in development in general), we have several options, one of them is to use Customizer, or we use an options page. What are the differences between these?
Option 1: Customizer
Customizer is the part of WordPress that has been created to customize our site (“customise”), it was created precisely for this, and with it you have its pros and cons:
Pros
- It was designed specifically for this purpose
- Each option can be added to your custom panel, or to a general one
- It offers live preview to see the changes immediately
- It offers a range of existing controls to make the job easier
Cons
- It will be discontinued in the not too distant future
- Its library of controls is not very wide
- The most custom controls can be difficult to implement
Option 2: Options page
On the other hand, if we create our own options page, we have more control over our result; however, at the same time, we have to create everything ourselves1.
Pros
- Total control over what we do
- Can live anywhere in the administration
- We can use the Settings API to make the job easier
Cons
- Requires more code
For the purposes of this tutorial, I will use option two, but with an important difference. I will not use the mentioned Settings API, but instead I will use React, with the help of the existing components in Gutenberg.
Why React?
Throughout my career, I have created countless options pages, each one different from the last, but one thing that almost all have in common is the need to add Javascript to the options, that's why in this tutorial I will skip that realization and instead start doing it with React from the beginning.
Now, after this huge introduction (I'm sorry!) we can start with the tutorial.
Step 1: Creating the local environment
Since this is a technical tutorial, I will assume that you have some knowledge
about how to start a local project, I would normally say that you can use any
environment you want, and I still say it, I will only ask that it is capable of
using node and that you install the package @wordpress/scripts (as in my tutorial
Compiling CSS and Javascript with wp-scripts).
Using wp-env
If you are not very familiar with local environments, I invite you to watch my video Creating a local environment for WordPress with WP-ENV on youtube where I explain an easy way to achieve it with the tools that WordPress offers.
After having our local environment, we can create our plugin, in this case we need a very simple one, just a class that we will start to be able to register our page:
mah-settings.php
1<?php2/**3 * Plugin Name: Mah Settings4 * Description: Tutorial to create an options page with React5 * Version: 1.0.06 * Author: Mario Aguiar7 * Author URI: https://marioaguiar.net8 * License: GPLv2 or later9 * Text Domain: mah-settings10 */11namespace Mah_Settings;1213require_once __DIR__ . '/php/class-mah-settings.php';1415use Mah_Settings\Settings;1617// Exit if accessed directly.18if ( ! defined( 'ABSPATH' ) ) {19 exit;20}2122$settings = new Settings();23$settings->init();24
php/class-mah-settings.php
1<?php2/**3 * @package Mah_Settings4 */5namespace Mah_Settings;67/**8 * Handles the options page9 */10class Settings {11 /**12 * Registers the hooks.13 *14 * @return void15 */16 public function init(): void {17 var_dump( 'My page' );18 }19}20
Once these files are created, we can enter our site and see My page at the top, this
means that our plugin is working.
Why a class?
While all this code could go only in the file where we register our plugin, it is a good practice to separate each component into its own class, it helps us to have things more organized and to prevent conflicts with other types of code that we use.
Step 2: Create an options page in WordPress
Once we have our plugin working, we will replace the content of the init function
with the admin_menu hook, which helps us to register our page in the menu:
1/**2 * @var string3 */4private $plugin_path = '';56/**7 * Menu slug.8 *9 * @var string10 */11private $menu_slug = '';1213public function __construct( string $plugin_file ) {14 $this->plugin_path = plugin_dir_path( $plugin_file );15}1617/**18 * Registers the hooks.19 *20 * @return void21 */22public function init(): void {23 add_action( 'admin_menu', [ $this, 'add_menu_page' ] );24}2526/**27 * Registers the options page.28 *29 * @return void30 */31 public function add_menu_page(): void {32 $this->menu_slug = add_menu_page(33 __( 'Mah Settings', 'mah-settings' ),34 __( 'Mah Settings', 'mah-settings' ),35 'manage_options',36 'mah-settings',37 [ $this, 'render_settings_page' ],38 'dashicons-admin-generic',39 9940 );41 }4243/**44 * Renders the options page.45 *46 * @return void47 */48public function render_settings_page(): void {49 ?>50 <div class="wrap">51 <h1><?php esc_html_e( 'Mah Settings', 'mah-settings' ); ?></h1>52 <div id="mah-settings"></div>53 </div>54 <?php55}56
There are a couple of important things happening here, I will try to explain them briefly:
- The
add_menu_pagefunction simply registers a link in the left menu of the administration, in it we add the title, the capabilities (or permissions) required to see that menu, and specify which function should be executed when that menu is accessed, which in this case will berender_settings_page. This function returns the hook of this new page, which we will save for later. - In the
render_settings_pagefunction, which will be shown when this page is accessed, we simply add a title (optional) and an empty container. Why do we add this? Because it will be filled with React.
Step 3: Register our scripts
To be able to register our scripts within the page, first we need to create them, so we will start by using the package @wordpress/scripts that we talked about earlier, so in a terminal we run:
1npm install --save-dev @wordpress/scripts2
After this we can update the configuration to compile our new files, either within the same package.json or with a simple webpack configuration file, so we create a file called webpack.config.js and place the following:
webpack.config.js
1const defaultConfig = require('@wordpress/scripts/config/webpack.config');23module.exports = {4 ...defaultConfig,5 entry: {6 ...defaultConfig.entry(),7 settings: './js/src/settings.js',8 },9};10
package.json
1"scripts": {2 "test": "echo \"Error: no test specified\" && exit 1",3 "start": "wp-env start",4 "stop": "wp-env stop",5 "build": "wp-scripts build",6 "dev": "wp-scripts start"7}8
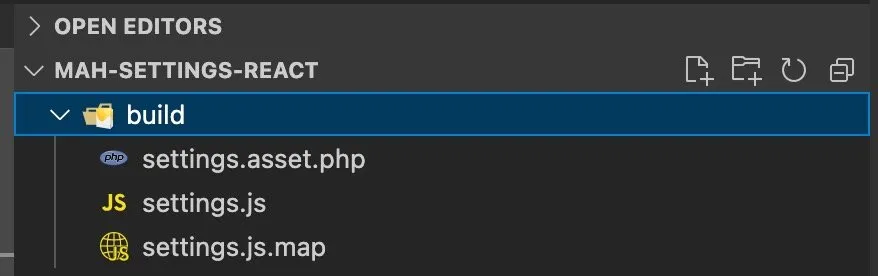
js/src/settings.js
1console.log('Hello settings');2
Basically we are extending the default configuration provided by WordPress to add a new file: settings.js, after this we can run npm run dev so that our file is watched and each new change is compiled.
After having our files created, we can register them with the admin_enqueue_scripts hook
1public static function init(): void {2 add_action( 'admin_menu', [ $this, 'add_menu_page' ] );3 add_action( 'admin_enqueue_scripts', [ $this, 'enqueue_scripts' ] );4}5
1/**2 * Registers the scripts and styles.3 *4 * @return void5 */6public function enqueue_scripts(): void {7 $screen = get_current_screen();89 if ( $screen->id !== $this->menu_slug ) {10 return;11 }1213 $asset = include $this->plugin_path . '/build/settings.asset.php';1415 wp_enqueue_script(16 'mah-settings',17 plugins_url() . '/mah-settings-react/build/settings.js',18 $asset['dependencies'],19 $asset['version'],20 true21 );22}23
Now I will explain a little what happens here:
- We get the information of the current page using
get_current_screen - We compare the ID of the current page with the hook we saved when we created the page, if it is the same, we continue; if not, we end here.
- Finally we register our new script using the dependencies that are added to the file (thanks to
@wordpress/scripts)
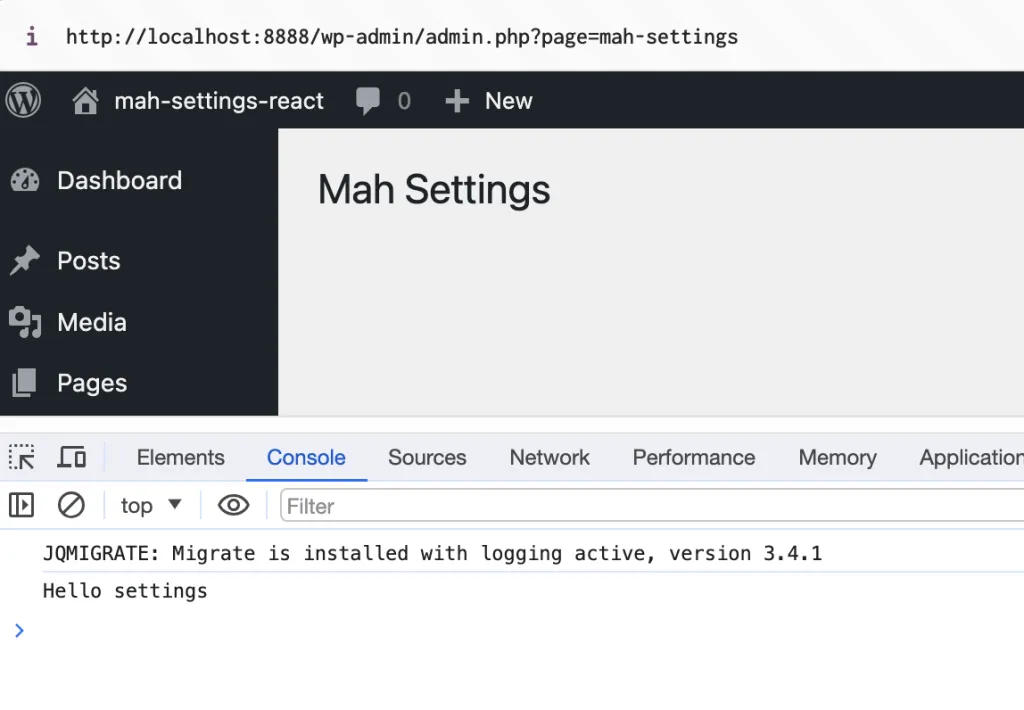
If everything went well, we will have our file working on the page:
What's next?
In part 2 of this tutorial, I will explain how we can add the React part to our site
using the components of @wordpress/components. For now, I hope this introduction
has been useful for creating an options page in WordPress with React and please let
me know if you have any questions. If you want to see the source code I used in this tutorial you can do it my repository