Create a settings page in WordPress with React – Part 3
During the second part of this tutorial to create a settings page in WordPress, I showed how to create a small React application that is displayed within our settings page, added a couple of fields and styles; and prepared the save button to work. Now what remains is to save the data inside our database and read it within our settings page to make sure we are not overwriting the data.
Table of Contents
Step 1: Saving our data
Starting from where we left off last time, fortunately WordPress already comes
with its utilities to make our lives easier, and, if we remember that in the second
part we registered our option using register_setting, we can use the ID we gave
it to load the saved options in our database like this:
1/**2 * WordPress dependencies3 */4import {5 Button,6 Card,7 CardBody,8 CardDivider,9 CardFooter,10 TextControl,11 ToggleControl,12} from '@wordpress/components';13import { useEntityProp } from '@wordpress/core-data';14import { __ } from '@wordpress/i18n';1516const Settings = () => {17 const [ apiKey, setApiKey ] = useEntityProp(18 'root',19 'site20 'mah_api_key'21 );22 const [ toggled, setToggled ] = useEntityProp(23 'root',24 'site',25 'mah_function'26 );27 const saveSettings = () => {28 console.log( 'Guardar' );29 };3031 return (32 <>33 <h1>{ __( 'Select the desired options', 'mah-settings' ) }</h1>3435 <Card>36 <CardBody>37 <TextControl38 help={ __( 'Insert your API key', 'mah-settings' ) }39 label={ __( 'API Key', 'mah-settings' ) }40 onChange={ setApiKey }41 value={ apiKey || '' }42 />43 </CardBody>4445 <CardDivider />4647 <CardBody>48 <ToggleControl49 label={ __( 'Activate functionality', 'mah-settings' ) }50 onChange={ setToggled }51 checked={ toggled || false }52 />53 </CardBody>5455 <CardFooter>56 <Button57 disabled={ ! apiKey }58 onClick={ saveSettings }59 variant="primary"60 >61 { __( 'Save', 'mah-settings' ) }62 </Button>63 </CardFooter>64 </Card>65 </>66 );67}68export default Settings;69
With this, we are reading the value of our option saved earlier, let's explain a little how it works:
- We load the
useEntityProphook that helps us read properties either from the site or from specific posts - This is evident in line 18 where we replace
useStatewithuseEntityProp, the hook keeps track of our value to maintain a record while it is saved - Finally, we add a condition to the value of our
TextControlwhere we basically say that if this value is empty (null) then return an empty string instead ('') - We do the same with our Toggle, this is to maintain the same type of data even when nothing is saved earlier
Now we need to save our data once the save button is pressed, for this we need to
replace the saveSettings function with a call to the functions available in the
@wordpress/core-data, and @wordpress/data packages
What is the difference?
If the question is why some functions are in core-data while others are in data? unfortunately I don't have the answer, we only know that the team that added them assumed that those were the best places to put them 🤷♂
1/**2 * WordPress dependencies3 */4import {5 Button,6 Card,7 CardBody,8 CardDivider,9 CardFooter,10 TextControl,11 ToggleControl,12} from '@wordpress/components';13import { store as coreStore, useEntityProp } from '@wordpress/core-data';14import { useDispatch } from '@wordpress/data';15import { __ } from '@wordpress/i18n';1617const Settings = () => {18 const [ apiKey, setApiKey ] = useEntityProp(19 'root',20 'site21 'mah_api_key'22 );23 const [ toggled, setToggled ] = useEntityProp(24 'root',25 'site',26 'mah_function'27 );28 const { saveEditedEntityRecord } = useDispatch( coreStore );29 const saveSettings = () => {30 saveEditedEntityRecord(31 'root',32 'site',33 undefined,34 {35 mah_api_key: apiKey,36 mah_function: toggled,37 }38 );39 };40[…]41
I have added only the important parts of our modifications, to understand a little more
- We must import
store, and give it the aliascoreStore(this is a good practice when working with several) where the function we need is stored1 - We load the
saveEditedEntityRecordoption from the store using theuseDispatchhook - We replace our save function so that it saves the content of our options with the function we just loaded
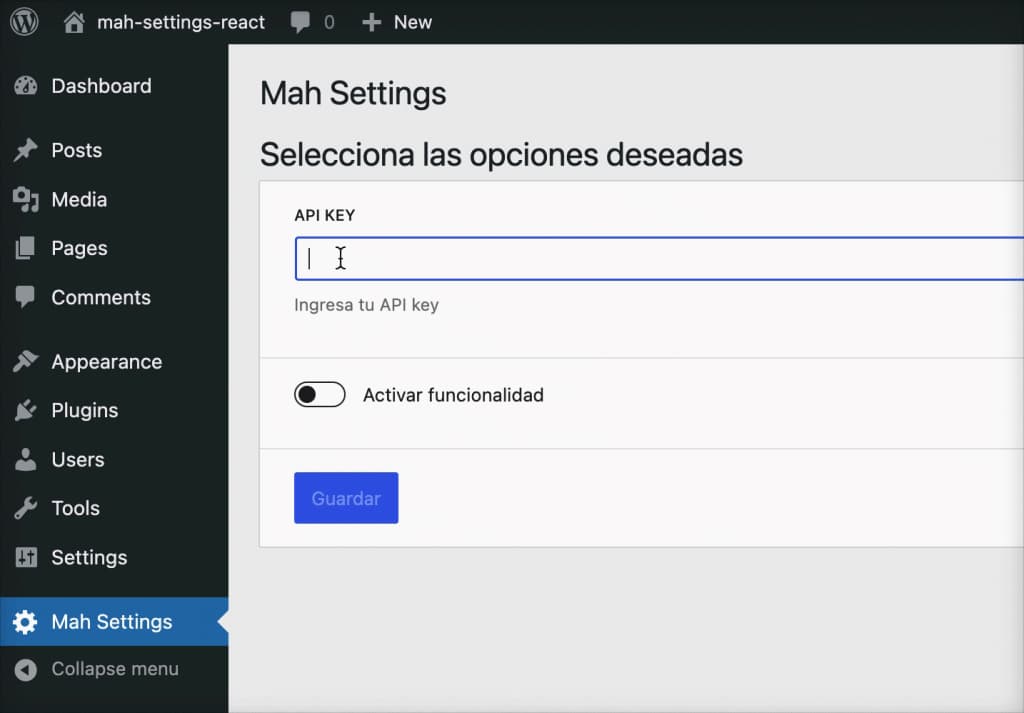
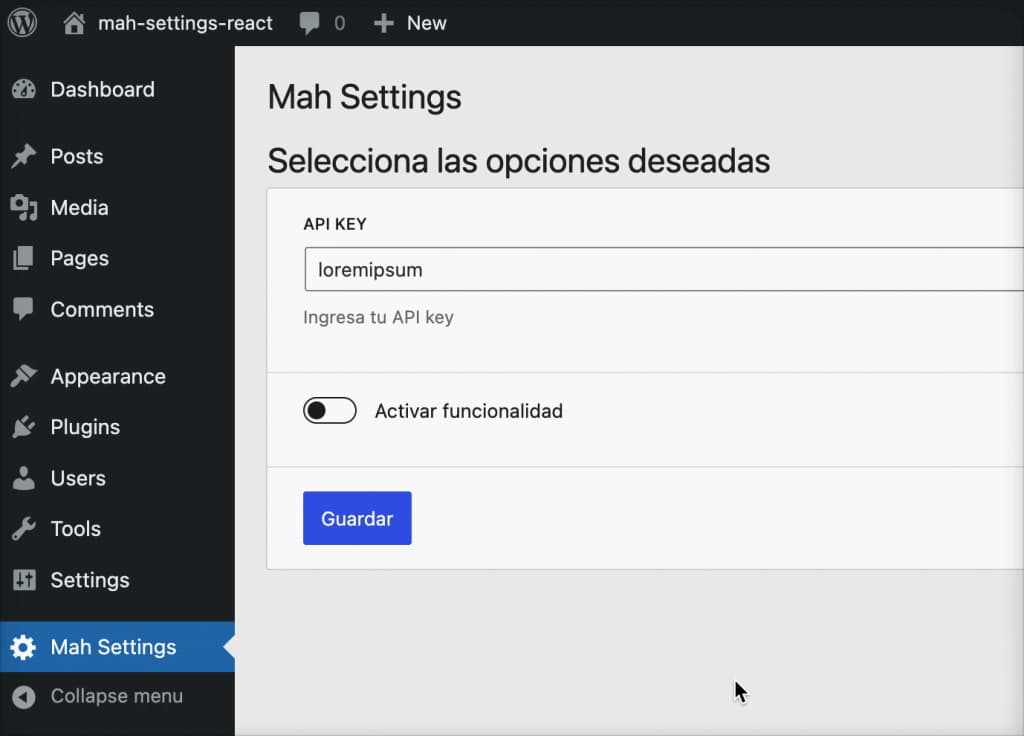
And that's it, now once we make changes to our controls we can see how their value persists when reloading the page, and we can use them throughout our site:
Step 2: Improving the experience
Although it is already saving our data, we are not finished yet, right? Can you see how easily we have to improve the experience?
Step 2.1: Loading indicator (Spinner)
The most logical thing I can think of: we don't know when or how our options have been saved. There is no indicator that tells us that the button worked until we reload the page and see them being loaded into the fields, so we can start with a simple Spinner.
With a few modifications and with the help of the @wordpress/components package again we can easily place it:
src/components/settings.js
1/**2 * WordPress dependencies3 */4import {5 Button,6 Card,7 CardBody,8 CardDivider,9 CardFooter,10 Spinner,11 TextControl,12 ToggleControl,13} from '@wordpress/components';14import { store as coreStore, useEntityProp } from '@wordpress/core-data';15import { useDispatch } from '@wordpress/data';16import { useState } from '@wordpress/element';17import { __ } from '@wordpress/i18n';1819const Settings = () => {20 const [ isLoading, setIsLoading ] = useState( false );21 const [ apiKey, setApiKey ] = useEntityProp(22 'root',23 'site',24 'mah_api_key'25 );26 const [ toggled, setToggled ] = useEntityProp(27 'root',28 'site',29 'mah_function'30 );31 const { saveEditedEntityRecord } = useDispatch( coreStore );32 const saveSettings = async () => {33 setIsLoading( true );34 await saveEditedEntityRecord(35 'root',36 'site',37 undefined,38 {39 mah_api_key: apiKey,40 mah_function: toggled,41 }42 );43 setIsLoading( false );44 };45[…]46
src/components/settings.js#49-85
1return (2 <>3 <h1>{__('Select the desired options', 'mah-settings')}</h1>45 <Card>6 <CardBody>7 <TextControl8 help={__('Insert your API key', 'mah-settings')}9 label={__('API Key', 'mah-settings')}10 onChange={setApiKey}11 value={apiKey || ''}12 />13 </CardBody>1415 <CardDivider />1617 <CardBody>18 <ToggleControl19 label={__('Activate functionality', 'mah-settings')}20 onChange={setToggled}21 checked={toggled || false}22 />23 </CardBody>2425 <CardFooter>26 <Button disabled={!apiKey} onClick={saveSettings} variant='primary'>27 {isLoading && <Spinner />}28 {!isLoading && __('Save', 'mah-settings')}29 </Button>30 </CardFooter>31 </Card>32 </>33);34
And the result would be:
Let's see what we did:
- We imported
Spinnerfrom our WordPress components, this is what will give us the loading indicator - We brought back
useState, we will use it to create a loading flag, which is disabled by default - We added the
asynccondition to our save function, this tells the browser that anawaitis coming - We changed our loading flag to enabled (this will show the Spinner), and
we tell the browser to wait for the result of the function with
await, before disabling our flag again - Finally, we indicate the conditions so that if the flag is enabled show our spinner, otherwise, show our text
Extra!
In addition to our spinner, it is often good to disable the button so that it cannot be used while our function loads. Can you figure out how to do this?
Tip: It will be included in the other examples and the repository at the end of the article.
Step 2.2: Success (or error) message
Another simple thing we can do is provide a success message (or error) when the process is finished, this will be a little different from what the WordPress editor does by default2, but we still have a component we can use.
We make some modifications to the first part of our file:
1/**2 * WordPress dependencies3 */4import {5 Button,6 Card,7 CardBody,8 CardDivider,9 CardFooter,10 Notice,11 Spinner,12 TextControl,13 ToggleControl,14} from '@wordpress/components';15import { store as coreStore, useEntityProp } from '@wordpress/core-data';16import { useDispatch } from '@wordpress/data';17import { useState } from '@wordpress/element';18import { __ } from '@wordpress/i18n';1920const Settings = () => {21 const [ isLoading, setIsLoading ] = useState( false );22 const [ showNotice, setShowNotice ] = useState( false );23 const [ apiKey, setApiKey ] = useEntityProp(24 'root',25 'site',26 'mah_api_key'27 );28 const [ toggled, setToggled ] = useEntityProp(29 'root',30 'site',31 'mah_function'32 );33 const { saveEditedEntityRecord } = useDispatch( coreStore );34 const saveSettings = async () => {35 setIsLoading( true );36 await saveEditedEntityRecord(37 'root',38 'site',39 undefined,40 {41 mah_api_key: apiKey,42 mah_function: toggled,43 }44 );45 setShowNotice( true );46 setIsLoading( false );47 };4849 return (50 <>51 <h1>{ __( 'Select the desired options', 'mah-settings' ) }</h1>5253 <Card>54 { showNotice && (55 <CardBody>56 <Notice57 isDismissible58 onDismiss={ () => setShowNotice( false ) }59 status="success"60 >61 { __( 'Saved Succesfully', 'mah-settings' ) }62 </Notice>63 </CardBody>64 ) }65[…]66
Basically what we are doing is:
- Import the
Noticecomponent from@wordpress/components - Create a flag that helps us know when to show the message using
useStateagain - When the save process is finished, we enable the flag to show the message
- Above our options, prepare the place where the message will be shown and specify that it should only be shown when the flag is enabled
- Inside the
Noticecomponent we specify what the message will be and add a function that disables our flag when the close button is clicked
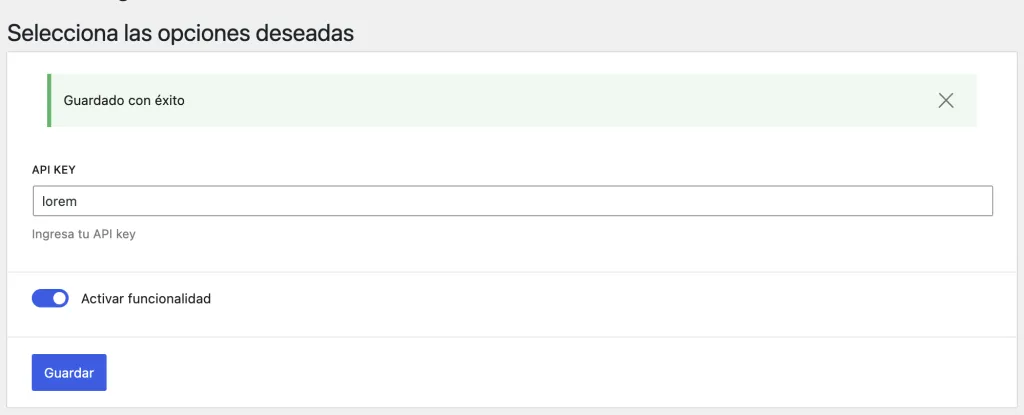
And now when we save our options, we will have a nice success message like this:
What if something goes wrong?
In this example, I have only added a success message, but, in case we also want to know if something has failed (recommended) we could log it with the following modifications.
- Create a state that saves the message we need, as well as its
status - Replace our async await function for a promise of format
.then().catch() - Save the error message in our variable inside the
catchfunction - Show our message changing the
statusdepending on whether it was success or error
Conclusion
I think our options page is now in a good place, I didn't expect this tutorial to be so long but I hope it was useful for someone. Finally, we managed to create our options page, to recap, this is what we have done so far:
- We created our environment, and our plugin
- We created our options page, and registered a script that runs only on it
- We registered our global options, and added our controls in React
- We saved our options in React, and added UX improvements
Finally, if you want to see the complete project you can do it in my repository on Github. Una vez más, todos los comentarios son bienvenidos y cualquier sugerencia sobre qué escribir después también. ¡Hasta la próxima!